One of my customers asked me, after reading my post over the Raspberry Pi if it is possible for a Raspberry Pi to restream to 4 Facebook pages, Youtube and Twitch at once. My honest answer was: “I don’t know”. But I tried and it is possible.
The goal for my customer Quin from forever27club, who makes a once a week talkradio live stream, is to avoid monthly payments for restream.io
What do we need
- Raspberry Pi 4 4GB
- A case for the Raspberry by, preferably with a cooler ( I prefer somthing like this)
- Power supply for the Raspberry Pi
- A SD card with A1 or A2 rating
- Micro HDMI to HDMI converter cable

How to start
At first we have to prepare the SD card.
Go to https://www.raspberrypi.org/software/ and download Raspberry Pi imager an app that makes it easy to add Raspberry Pi OS to the SD card. After downloading and installing you see this screen
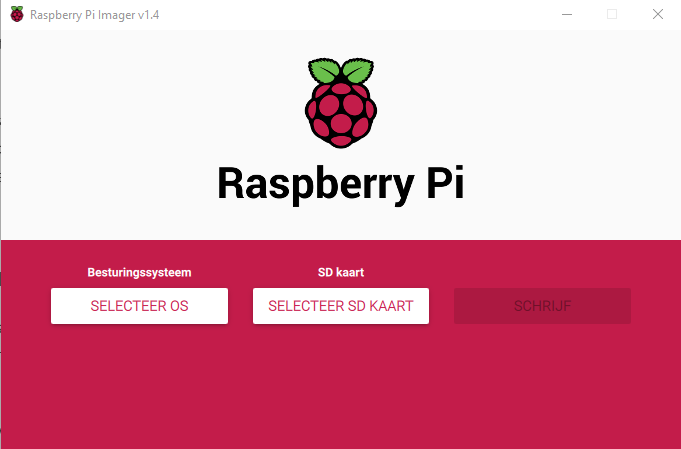
Press “SELECTEER OS” or “CHOOSE OS” and select the preffred option.
While other and after that Rapsberry Pi OS Lite (32 bit) will do, I used Raspberry PI OS (32 bit). The reason for that is that I want to see if I can make an web based user interface to alter the stream configurations.
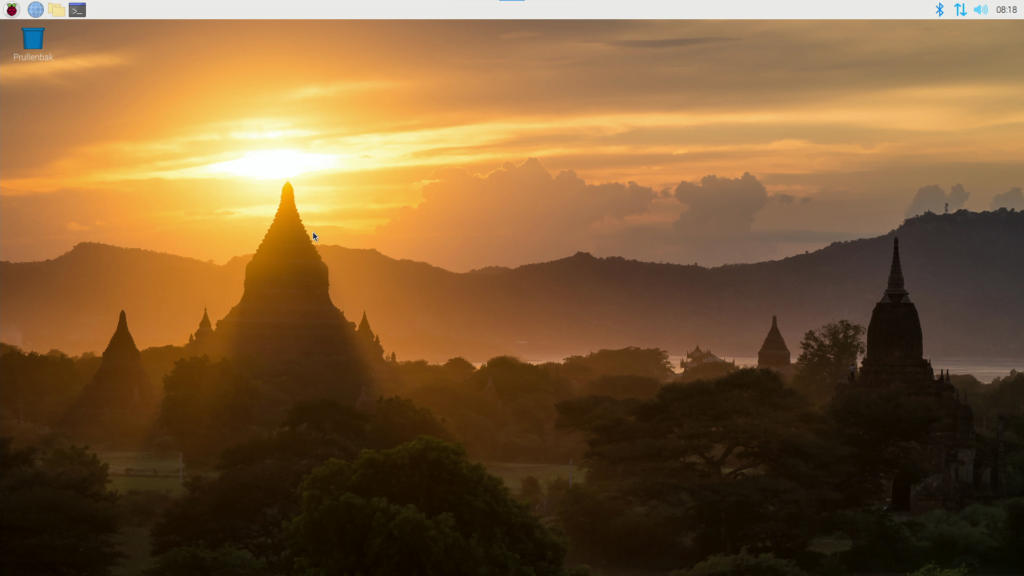
Go ahead and get the OS on the SD card. Take the SD card out your computer and put it into the Raspberry Pi. Connect the Pi to your network (preferably wired) hookup a monitor, mouse and keyboard. (I have wireless mouse and keyboard using one receiver, but wired USB will do, after setup you will not need them)
After answering some installation questions you will end up with a screen like this
Click on the fourth button on top to open a terminal.
First for security reasons we want to change the default password for the user pi. the default password is “raspberry”. So go ahead and type the next line in the terminal and hit enter.
sudo raspi-config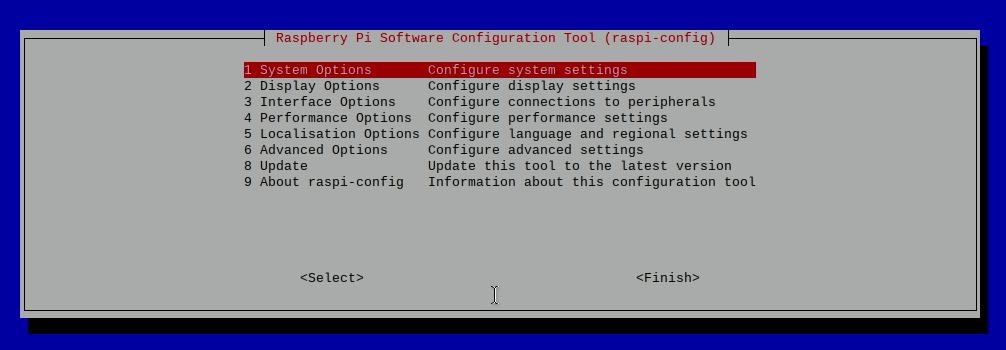
choose the first menu option, and in the next screen the second third option (S3) to change the password. You will have to type the new password twice but will not see any characters while typing.
Next we want to make it possible to access the pi over the network to make it easier to copy and paste configuration files from our own computer. So we choose 3 Interface options and after that P2 SSH. Enable SSH choose finish. We are now back in the terminal.
Last thing we do here is check what the IP address for the Pi is. type the next line and hit enter.
sudo ifconfig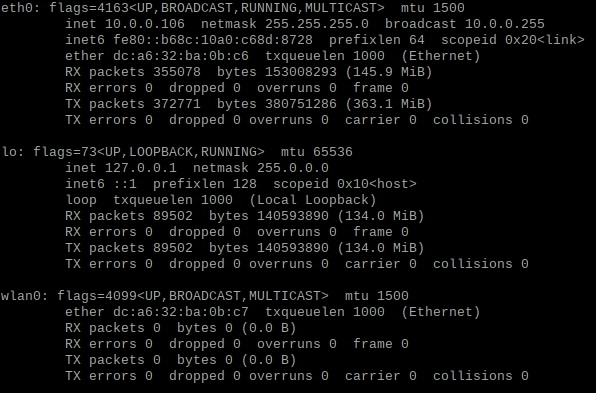
In the image above we see the result for ifconfig. eth0 is the whired ethernet adapter. In the second line after inet we see the IP address for the pi: 10.0.0.106 (in my case).
Now we will reboot the Pi. Type the next line and hit enter
sudo reboot -h nowWhen the Pi is booted again we are able to connect to it from any computer in the network. I prefer putty for that. Go ahead download it or use any other terminal program if you want.
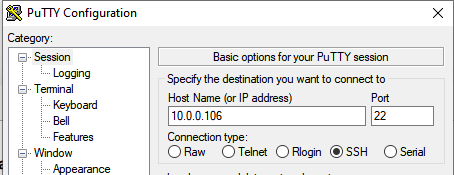
In Putty set the op address to the address found in the previous step tick SSH and make sure that the port is set to 22
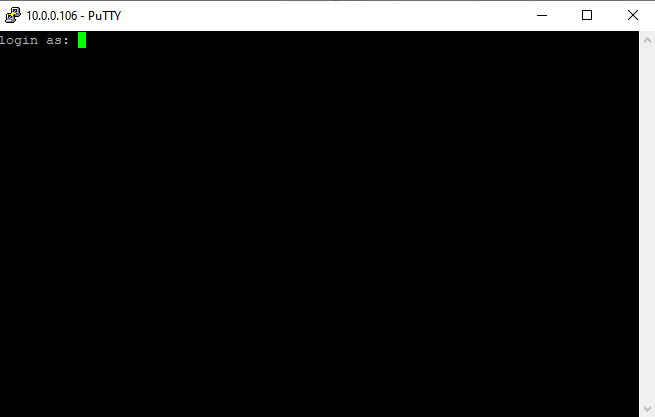
When you hit open we get a terminal for the Pi on our computer
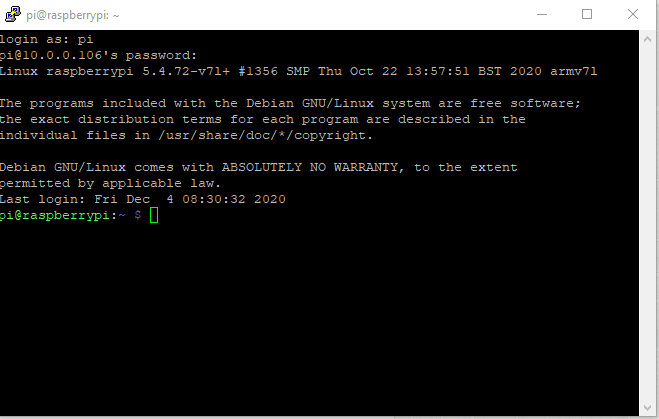
Type pi and hit enter. Use the password you choose before and hit enter. You are now in the Pi.
First we will make sure all software is up to date. Type the next lines and hit enter after each. If update are presented hit Y to install them
sudo apt update
sudo apt upgrade
Now we want to install the needed applications type the next line and hit enter
sudo apt install nginx libnginx-mod-rtmpTo do the setting we need to edit the nginx config file type the next line
sudo nano /etc/nginx/nginx.confscroll to the end of the file and copy the next lines there
  server {
    listen 1935;

    application live {
      # Enable livestreaming
      live on;

      # Disable recording
      record off;

      # Restream to youtube
      push rtmp://a.rtmp.youtube.com/live2/<streamkey>;

      # Push URL with the Twitch stream key
      push rtmp://live-cdg.twitch.tv/app/<streamkey>;
    }
  }
}
To save the file hit ctrl-x and enter.
You might have noticed there is no restreaming to Facebook in this configuration. That is correct. As we look at the stream url for Facebook it is using rtmps.
rtmps://live-api-s.facebook.com:443/rtmp/Facebook stopped supporting rtmp (without s) streams in November 2019 and libnginx-mod-rtmp does not support rtmps. So we need a little workarround.
Fortunately there is Stunnel a proxy designed to add TLS encryption functionality to existing clients and servers without any changes in the programs’ code.
So we need to install stunnel:
sudo apt install stunnelNow we need to edit the stunnel configuration
sudo nano /etc/stunnel/stunnel.confadd the following lines and save the file
setuid = stunnel4
setgid = stunnel4
pid=/tmp/stunnel.pid
output = /var/log/stunnel4/stunnel.log
include = /etc/stunnel/conf.d
No we have to enable stunnel
sudo nano /etc/default/stunnel4add the next line to the end and save the file.
ENABLE=1Now we add a tunnel for Facebook Live address
sudo mkdir /etc/stunnel/conf.d
sudo nano /etc/stunnel/conf.d/fb.conf
add the next lines and save the file
[fb-live]
client = yes
accept = 127.0.0.1:19350
connect = live-api-s.facebook.com:443
verifyChain = no
Next we restart stunnel and check it’s status
sudo systemctl restart stunnel4 && sudo systemctl status stunnel4Now stunnel is ready to use. Instead of the normal line for Facebook
push rtmps://live-api-s.facebook.com:443/rtmp/<streamkey>We now can use
push rtmp://127.0.0.1:19350/rtmp/<facebook-live-stream-key>;So we add that to nginx.conf
sudo nano /etc/nginx/nginx.confmake it look like:
rtmp {
  server {
    listen 1935;

    application live {
      # Enable livestreaming
      live on;

      # Disable recording
      record off;

      # Restream to youtube
      push rtmp://a.rtmp.youtube.com/live2/<streamkey>;

      # Push URL with the Twitch stream key
      push rtmp://live-cdg.twitch.tv/app/<streamkey>;

      # Restream to facebook we need to use stunnel
      # since rtmps is not supported
       push rtmp://127.0.0.1:19350/rtmp/<streamkey>;

    }
  }
}
Need to stream to more facebook pages or youtube accounts? Simply copy the and line alter the streamkey.
I will also translate this tutorial for my Dutch readers